COWL FLAP
click on images to view larger picture
click on images to view larger picture
The engine oil cooling on my RV8 has been a reoccurring problem during the hot Oklahoma summers. Although the larger oil cooler and the larger air supply duct to the cooler have reduced temperatures dramatically during cruise, the oil temperatures in the climb have been a problem. A normal oil temperature during climb in the summer is reading about 225 degrees F. Once leveled out in cruise, the temp drops to 195 to 200 degrees. I decided to install a cowl flap to help pull air thru the cooler during climb.
I looked at two methods of controlling the cowl flap. The first was by using a manually operated cable from the cowl flap to the cockpit. Since I already have two controls for the oil cooler installed in the cockpit, I didn't want to install another cable control. What I decided was to electrically control the cowl flap using a Ray Allen servo. This is the same servo used for the elevator trim.
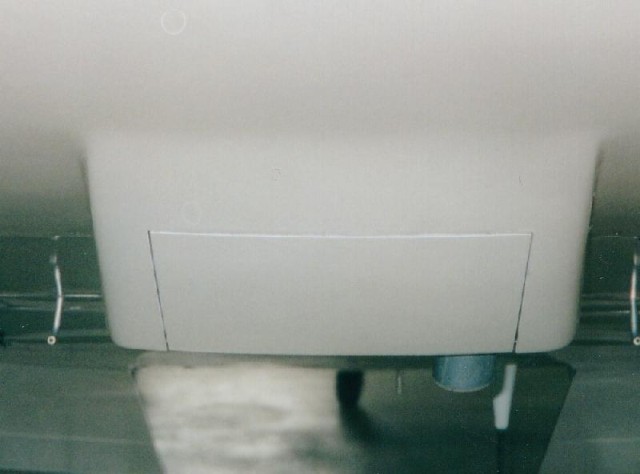
I examined the cowling to decide where and how big the cowl flap would be. The exit ramp on my cowling had been enlarged, during the building process, from 2" to 3 1/4" wide. I decided to make the cuts in the flat part of the cowl ramp opening, staying away from the curved sides. The first step was to beef up the inside skin of the cowl door with a couple layers of glass.
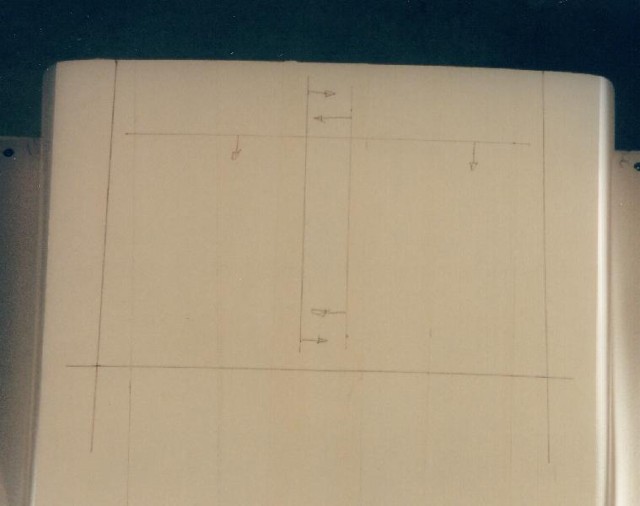
The cutout in the cowling was first drawn on the inside of the cowling. Once the cut lines had been determined, the outside of the cowling door area was covered with masking and tape and the lines were transferred to the outside.
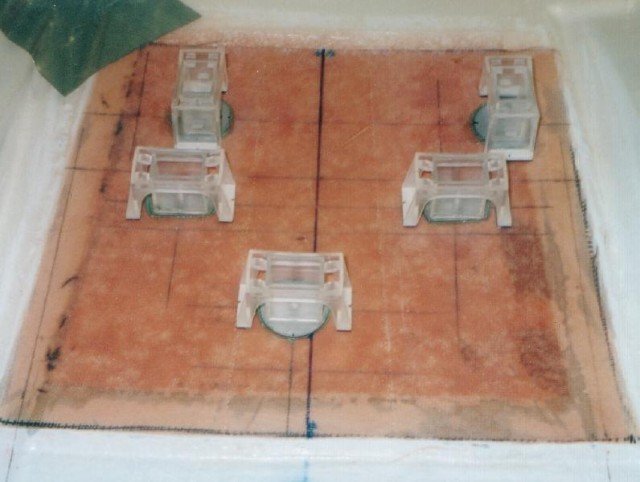
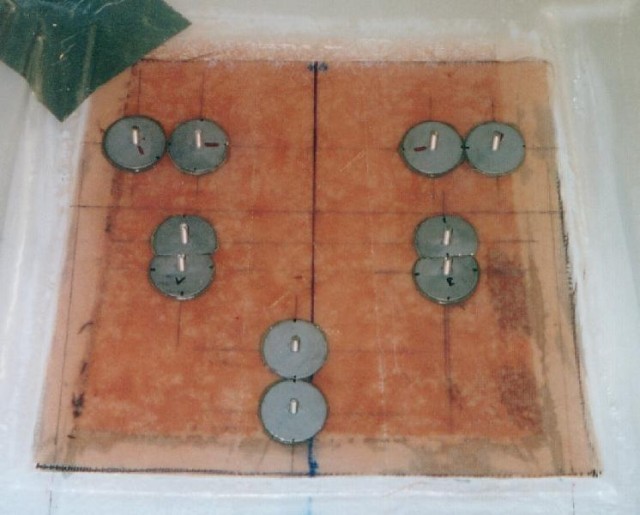
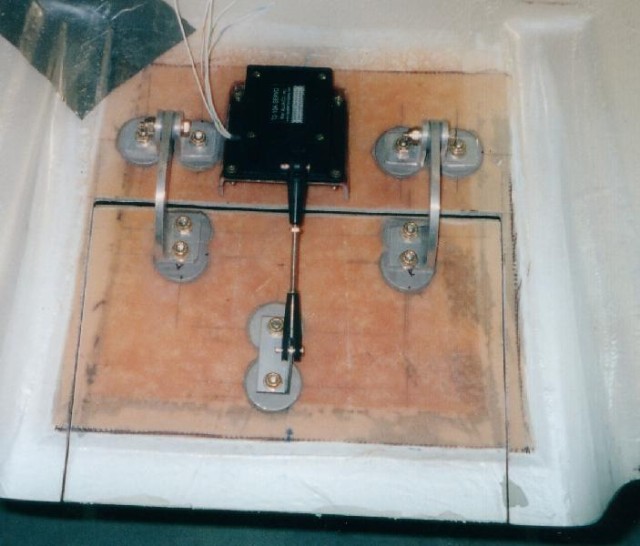
Before cutting the cowling, the hinges had to be located and mounted so that after the door was cut, the hinge would place the door back to its' original (closed) position. I did not want to have any mounting hardware visible on the outside of the cowling. While at Sun n Fun I visited a booth called the Flight Shop They have some cool fasteners called Click Bond that mounted to any surface with a special adhesive. Their web site had a lot of information on the Click Bond fasteners and the cost. I bought some 8-32 threaded studs to mount all the components for the cowl flap operation. I bought some cable tie mounts to run the wire along the cowling to the plug at the firewall. These fasteners have there own mounting support that hold the threaded stud in position while the adhesive sets up. After about an hour, you can carefully remove the supports off the hardware. The adhesive smells like the glue used in the dentist office.
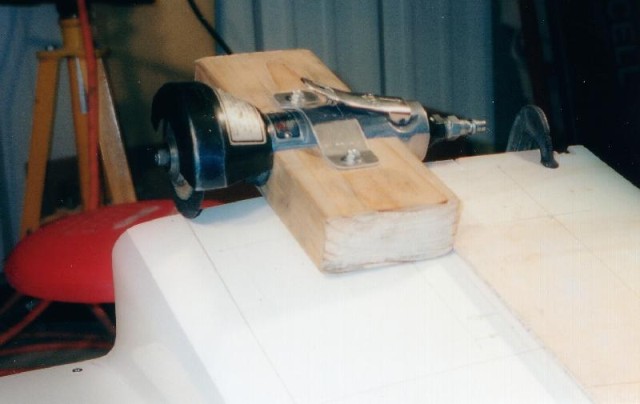
Cutting of the cowling was the scary part. A screw up would be visible to everyone. I considered using a router, but the cut would be wider than I wanted plus there was a good chance of coming off the guide while cutting. I used a small air powered abrasive cutting wheel. Bending a piece of 1/16" plywood, along the set back for the cut line, I clamped and taped the plywood to the cowling. I made a cradle from a 2 x 4 to clamp the cutting tool in. This actually worked very well. The 2 x 4 cradle followed the 1/16 plywood guide without out deviating off the line. After all the cuts were made, I used a small hobby saw and an exacto knife to complete the cut at the corners.
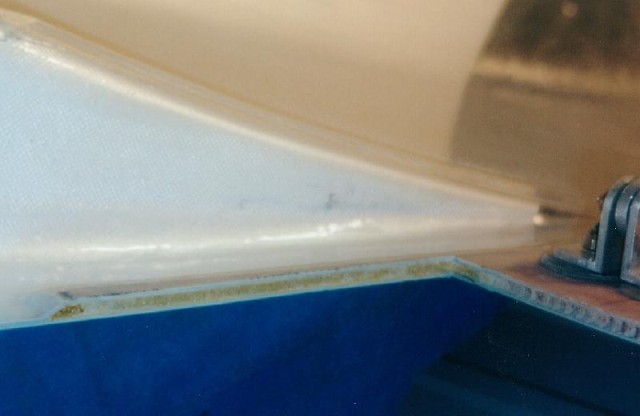
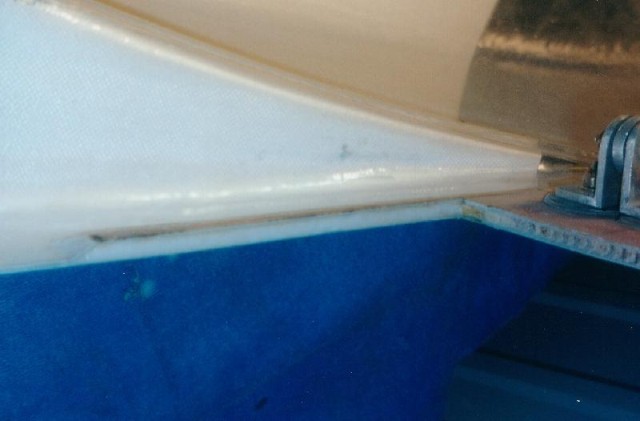
The honeycomb used in the cowling was exposed after the cuts were made. To clean and strengthen these edges, I used a dremel with a small wire brush wheel and cleared the honeycomb material back away from the edge. I then used a mixture of 5 minute epoxy and cotton flox to fill the the exposed edge. By using 5 minute epoxy, you can do all the edges of the cowling in about an hour.
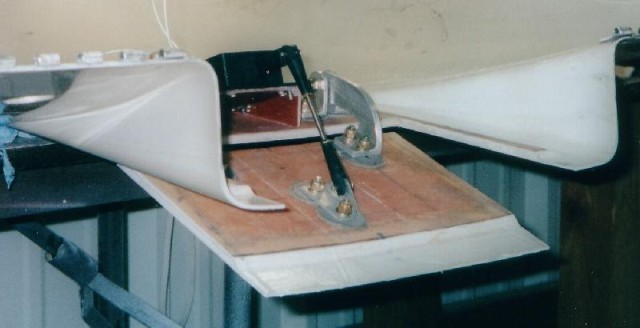
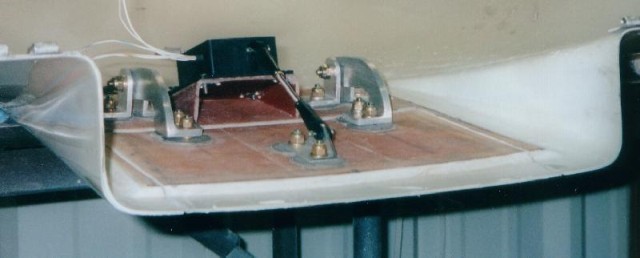
All components were attached using metal lock nuts. The servo bracket was attached with 5 minute epoxy and then later a few strips of fiberglass were used to strengthen the joints.
Fiberglass sides were made for the cowl flap to help guide the air out of the cowling. These were trimmed to clear the exhaust stacks exiting the cowling. An UP stop was installed at the rear of the flap opening to hold the flap in position during cruise.
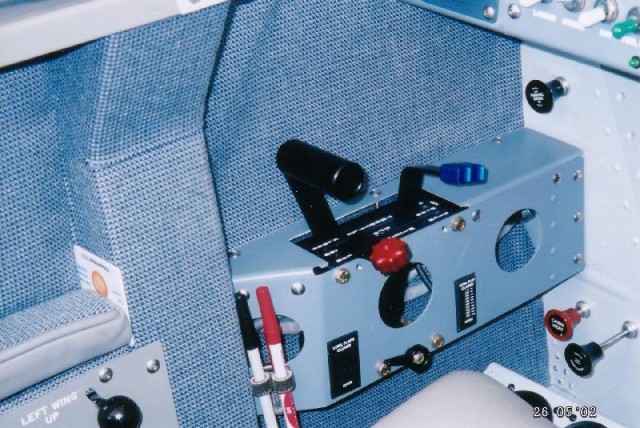
I bought 20 feet of 5 stranded wire from Ray Allen that runs from the servo to the control switch and indicator in the cockpit. A small plug was used at the firewall to facilitate cowling removal. The switch and indicator were mounted on the side of the forward throttle quadrant. This puts the switch in a comfortable and accessible position while flying the aircraft.
!! RESULTS !!
The hot summer temperatures are here and I have been able to test the cowl flap. I was at Longmont, CO for the EAA flyin in July and the temperature at the airport was 95 degrees when I took off for Tulsa. The density altitude at the airport was very high, but the RV8 leaped off the ground and headed skyward. I climbed to 9500' after takeoff using 120kts climb speed. During the entire climb the oil temp indicated 210 degrees. The oil temps previously ran around 225 degrees in the climb before the cowl flap. After level off and closing the cowl flap, the temps dropped to 200 degrees. The cowl flap has no effect on the oil temps at cruise speeds.
You do have to remember to open the cowl flap before takeoff. If you forget and open it in the climb, the oil temps will be too high for the cowl flap to do any good, especially since the RV climbs to altitude very rapidly.
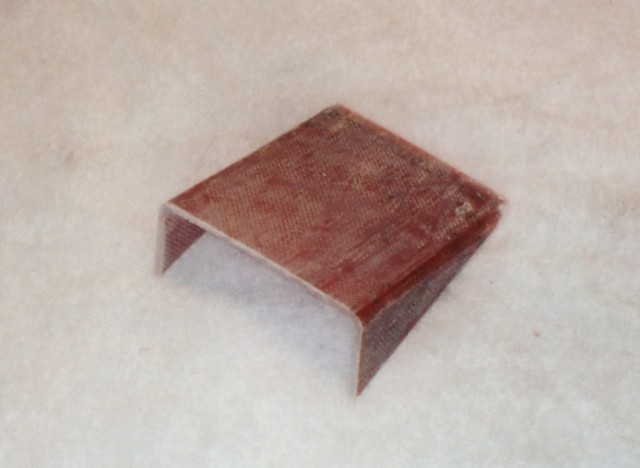
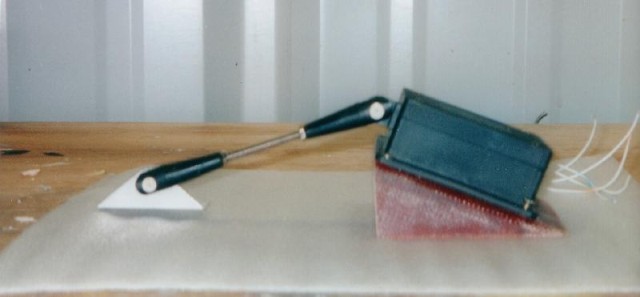
After making a few mockups of the cowl area, I decided to mount the servo on the flat part of the cowl opening. With the servo mounted flat on the cowl opening, the door would move to the vertical position when the servo was fully extended. I only required about 2" door movement. To accomplish this, I had to mount the servo at an angle away from the door. Trying different angles, I came up with an angle of about 25 degrees to achieve the 2" door movement. This required me to build an angled bracket for the servo to mount to. I built this bracket out of fiberglass.
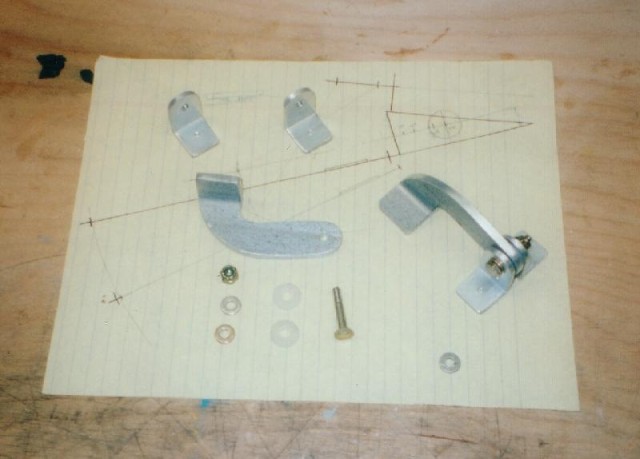
The next step was to determine what type of hinge to use. A piano hinge came to mind but, do to the small curve in the door from left to right, this would not work without binding. I came up with a hinge that was similar to the trunk hinge in your car. The hinge arm was made out 1/8" thick aluminum angle. The hinge pivots were made out 3/4 x 3/4 aluminum angle.


